Friday, 30 December 2016

Bullet Journal 2017

As 2016 draws to an end, it's time to begin thinking about the New Year and what it will bring. I for one absolutely love notebooks, organisers, diaries and lists. I make lists for the sake of making lists but it definitely helps keep my life organised.
 
I was bought this cute little owl notebook for Christmas and couldn't think what to use it for. I didn't want it to go to waste so began thinking of organising 2017. I stumbled across 'Bullet Journals' a while back but felt it was best starting at the beginning of a new year!


To begin with, I created a contents page on the inside left cover. All pages in a Bullet Journal have page numbers so the contents page (in chronological order) states the Pg number and what it's about.


On the next page is the 'Key'. Keys are important as they symbolise different meanings to your tasks and notes. I've opted for event, important, to do, task completed, appointment and note. Whenever I make a list of things to do I'll be using these symbols.


On the next page I have opted for a double page spread of Birthdays! I hand drew 12 balloons (one for every month), lightly shaded around the edges and wrote the name of the month inside
each balloon. I will add important birthdays inside these balloons :)
 

A big goal of mine in 2017 is to lose weight. I've got some exciting holidays coming up as well as being bridesmaid for my best friend. This page will have my weekly weigh in amounts inside each box. Starting with my starting weight in the top left hand box, I will add my weight in each week until I've reached my goal... which I will!


Adding to my weight loss motivation on the next page of my Bullet Journal is the 'Inches Lost' page. I've hand drawn a female body with before and after measurement spaces. I will take all of my measurements (in inches) and write them in the before sections and when I'm at goal weight I'll add my final measurements in the 'after' section. This makes it clear for me to see how many inches I've lost!


This is a favourite of mine! I love keeping my house clean and tidy but sometimes I can get bombarded with all the cleaning and washing I've 'forgotten to do'. This page now means I can have clear house work duties for certain days. This will hopefully relieve some of my weekend chores.

 
Another really important page in my Bullet Journal is the 'Saving Goals' page. In 2017 I'm hoping to move and find my forever home. This means I've got some serious saving to do. Although I'd love to save more than £200, I feel that £200 as a minimum is a comfortable amount for me. As the months go by I get to colour in each section (to the next line) until we reach December 2017 :)
 
 
A nice little quote for my 'Making Memories' page.
 
 
Goals page! These are going to be things I'd like to achieve in 2017. Having goals really helps to keep me focused. This is only the beginning of my Bullet Journal, I've got so much more to add to it, after all it is a working document!
 
As I continue adding to my Bullet Journal I'll keep on posting updates. Although this has been very satisfying to draw by hand, it has inspired to me perhaps create some Bullet Journal printables. We'll see...
 
Thanks for reading
 
Doll xoxo


Thursday, 29 December 2016

Christmas Eve Sparkle

Christmas Eve makeup

Dressed up and ready to sparkle, this year I've opted for a dark but glittery eye.

I recently discovered Peaches & Cream who are a makeup company based in Liverpool UK and their loose pigments are amazing! Being a smokey eye lover, I ordered two pigments.

Pearl loose pigment £6.95 https://www.fabulousmakeup.co.uk/pearl
This pigment is a pearl colour but has undertones of pink which are shimmery and beautiful! I used this on my brow bone and the inner corners of my eyes to highlight. 

Here's a hand swatch 


Wicked loose pigment (this currently isn't available on the website, not sure why).  I used this pigment all over my lids and blended it out into my crease to create a smokey look.

Here's a hand swatch 


This is definitely one of my favourite eye looks!


Merry Christmas to you all :)

Doll xoxo

Friday, 23 December 2016

MAC Christmas delivery!

What could be the best thing to happen on 23rd December? A MAC delivery! Two new items to add to my ever growing collection of makeup.

Item no 1 is the Set Powder in the colour Porcelain. It's £21.00 and can be purchased here http://www.maccosmetics.co.uk/product/13849/542/products/makeup/face/powder/set-powder#/shade/Porcelain

This is a tub of loose powder which I'll use to set my makeup and 'bake' my under eye area. Won't be using this until the big day! :)


Item no 2 is the Extra Dimension Skin finish highlighting powder in the colour Double Gleam. It's £24.00 and can be purchased here http://www.maccosmetics.co.uk/product/13849/21865/products/makeup/face/powder/extra-dimension-skinfinish


I also won't be using this until the big day however I couldn't help but swatch it and it's amazing! I'll use this powder to highlight my cheek bones, end of my nose and cupids bow :)

 
I can't wait to show you my Christmas day makeup now!
 
Doll xoxo
 

Christmas Nails 2016!

These are my Christmas nails for 2016! Although they're not 'traditional' they are my favourite colour (blue) and I have a bauble on each hand! Extremely happy about this :)

Doll xoxo

Sunday, 11 December 2016

Neutral brown makeup look

Hey guys, here's my step by step guide to how I created my neutral brown eye makeup plus my face makeup routine!

First thing I always do is prime my face. This helps to prolong my makeup and also helps achieve a smooth application. This is the Nivea for men post shave balm for sensitive skin, yes I end up smelling like a man but for £5 it's a pretty good primer. 


After priming my face with the Nivea post shave balm, I lightly spray my face using the MAC prep + prime fix plus spray for £17.50. Here's the link to show where you can buy it

http://www.maccosmetics.co.uk/product/13825/32212/products/skincare/primers/prep-prime-fix 


Here I am prepped and primed but still looking rough (ha)!


Next step is to banish any blemishes! I use the MAC pro longwear concealer in the colour NW15 I use a tiny amount on my finger and dab on any blemishes I have. Here's the link to show where you can buy it

http://www.maccosmetics.co.uk/product/13844/10181/products/makeup/face/concealer/pro-longwear-concealer


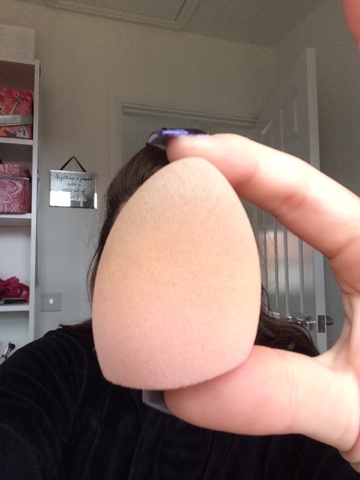
I then use my beauty blender to blend the concealer into my skin. I purchased this from Ebay it was a few £s.


Next step is my foundation! I've been an Estée Lauder double wear lover since the age of 16 and I use it everyday. I wear the colour 2N1 Desert Beige. Here's the link to show where you can buy it

http://www.esteelauder.co.uk/product/643/3894/Product-Catalog/Makeup/Face/Foundations/Double-Wear/Stay-in-Place-Makeup-SPF-10


I apply my foundation with a flat brush like this one here. I make circular motions to work the product into my skin. This brush was just a cheap one purchased from Boots.


Next job is applying some loose powder to 'set' my foundation. Here I'm using the Natural Collection loose powder in the colour Warm Translucent I picked this up from Boots (this colour is a little too warm for me so wouldn't purchase this again but I've bought it so I use it!). I apply this with a large powder brush and wipe away any excess with the brush.


After setting my foundation I highlight my under eye area. I've used NYX concealer in the colour CW02 Fair This cost me £5.50 and can be purchased from Boots. I do find this product quite hard to blend in. It kind of sticks to my skin and doesn't blend all too well so I will be on the look out for a new highlighting concealer. After applying concealer under my eye, I blend it out using my beauty blender.


I then add some powder under the eyes to ensure they stay highlighted. Here is my very loved and used Rimmel face powder in the colour 001. I do need a new one!


Here I am with my foundation and under eye concealer applied and blended. 


Next step is contouring and bronzing! Another love of mine is the Estee Lauder Bronze Goddness bronzer in the shade medium which costs £33.00. Here's the link to show you where to buy
http://www.esteelauder.co.uk/product/640/25326/product-catalog/makeup/face/bronzers/bronze-goddess/powder-bronzer


I take a tapered brush to apply my bronzer to my cheek bones. Again this was just a cheap brush purchased from Boots.


I apply the bronzer directly to my cheek bones to contour them.


I then blend it out with a bigger powder brush to ensure it doesn't look harsh. I then apply a little more bronzer to the outside of my forehead under my chin and down each side of my nose. This is how I look when all of my contouring is done!


Now for a touch of blush. Here I#m using Rimmel lasting finish soft colour blush in the colour 050 live pink.


My face is finished!


Now for my eyebrows. I've drawn my eyebrows on everyday for the past 6 years! Here I've used the Rimmel eyebrow pencil in the colour 001 Dark Brown. 

Image result for rimmel eyebrow pencil dark brown
Now time to prime the eyelids! I always prime my lids before applying eye shadow  to ensure the colour lasts as long as possible. It also creates a nice neutral base for your eye shadow to sit on top of. Here I'm using the lemon aid eye primer from benefit. Here's the link to show you where to buy 

https://www.benefitcosmetics.com/uk/en-gb/product/lemon-aid


Once my eyelids are primed and ready I then decide on my colours! Today I decided on a neutral brown look so for this I used my Naked pallet by Ubran Decay. Here's where to get yours!

http://www.urbandecay.co.uk/en_GB/what-s-new/blogger-faves/naked/UD245.html
Image result for naked palette urban decay


To create my neutral brown eye shadow look I started by using the colour 'Virgin' all over my lids. This is a lovely light shimmery colour. I then added the colour 'Naked' into my crease to create definition. Next step was to darken the outer corners so to do that I added the colour 'Buck' to the outer edge of my crease. Now for a little bit of extra shimmer I added the colour 'Sin' onto my lids on top of the colour 'Virgin'. I made sure all my colours were blended evenly by using a large fluffy blending brush. The last thing I did was add some of the colour 'Virgin' to my brow bone just to highlight.

Add some winged eyeliner and mascara and there you have it!

I finished off the look using my fave 'Chubby Stick' from Clinique in the colour 'Grape'.


Thank you for reading! As Christmas approaches there are so many more opportunities for amazing makeup and eye shadows so stay tuned :)

Doll xoxo


Friday, 2 December 2016

Fresh nails!

I've just been to the salon for a new set of nails. I'd broken one whilst cleaning my house so had a tip put on until it grows again... teaches me for cleaning! This time I've opted for a dark shimmery purple with a gold glitter nail on each of my ring fingers. Feeling festive but these colours are  perfect for the Christmas parties.

Hope you like!
Doll x

Sunday, 27 November 2016

Christmas tree

Hey everyone! Yes it's only November but I can't hold back the festivities any longer. Last year was my first Christmas in my house and I was given a small 5ft tree to use from my Nanna (bless)! However this year, I've gone all out and bought the tree of my dreams! This is the 7ft Cleveland Pre-lit Christmas from B&Q which was £167, here's the link
 
It's a lovely dark green colour and comes pre-lit. Here's what it looked like when I'd just put it together and switched on the lights.
 
 
The decorating begins!
 
I started by wrapping some glittery silver material around the tree. I bought 3 of these 2.5 metre rolls (which are from The Range) and I managed to wrap them round 4 times.
 
 
The next thing was adding the silver baubles. I always start with small baubles at the top and then work my way down the tree with the baubles getting bigger (with the biggest at the bottom).
 
 
Once all of the silver baubles were on I then began adding pink baubles, icicles and all of my 'more expensive' baubles.  

 
A lot of these decorations are from B&M with only a few purchases from The Range.


I did buy a lovely star (from The Range) for the top of my tree however quickly discovered that it wasn't going to stay stood up as it was far too heavy. I returned the star and spotted this medium sized bow (which has ties on the back) and wondered what it would look like on the top of my tree. Turns out that I love it!


The final product!
 
This is what my tree looks like in daylight,
 
 
This is what my tree looks like at night,
 
 
Hope you like!
To see lots of my Christmas decoration pictures then keep checking my Instagram @anniejt92
 
Doll x